# Using the Enovate IT Local AI Server for Coding This guide walks you through connecting to our **self-hosted AI server** and wiring it into your favourite coding tools. The server runs locally on our network via **Open WebUI + Ollama**, so your prompts and code never leave our infrastructure. By the end you'll be able to: 1. Sign up on the internal Open WebUI portal. 2. Grab your personal API key. 3. Use that key with **Aider** (terminal, Claude-Code style) or **Cline** (VS Code / Cursor extension). --- ## Prerequisites Before you start, make sure of the following: - **You are connected to the office VPN.** The AI server lives on the internal network and is *only* reachable through the VPN. If you're off-VPN, none of the URLs below will resolve. - You have a terminal (macOS / Linux / WSL) if you plan to use Aider, or **VS Code / Cursor** if you plan to use Cline. - **Python 3.8+** installed if you'll use Aider. > The portal is served over plain HTTP on the local domain, so your browser will show a **"Not Secure"** warning in the address bar. That's expected for an internal service — you can safely proceed. --- ## Step 1 — Sign Up on Open WebUI Open your browser and go to: ``` http://ai.enovate-it.local:12000 ``` You'll land on the **Sign in to Open WebUI** screen. Since you don't have an account yet, click **"Sign up"** at the bottom (circled below). 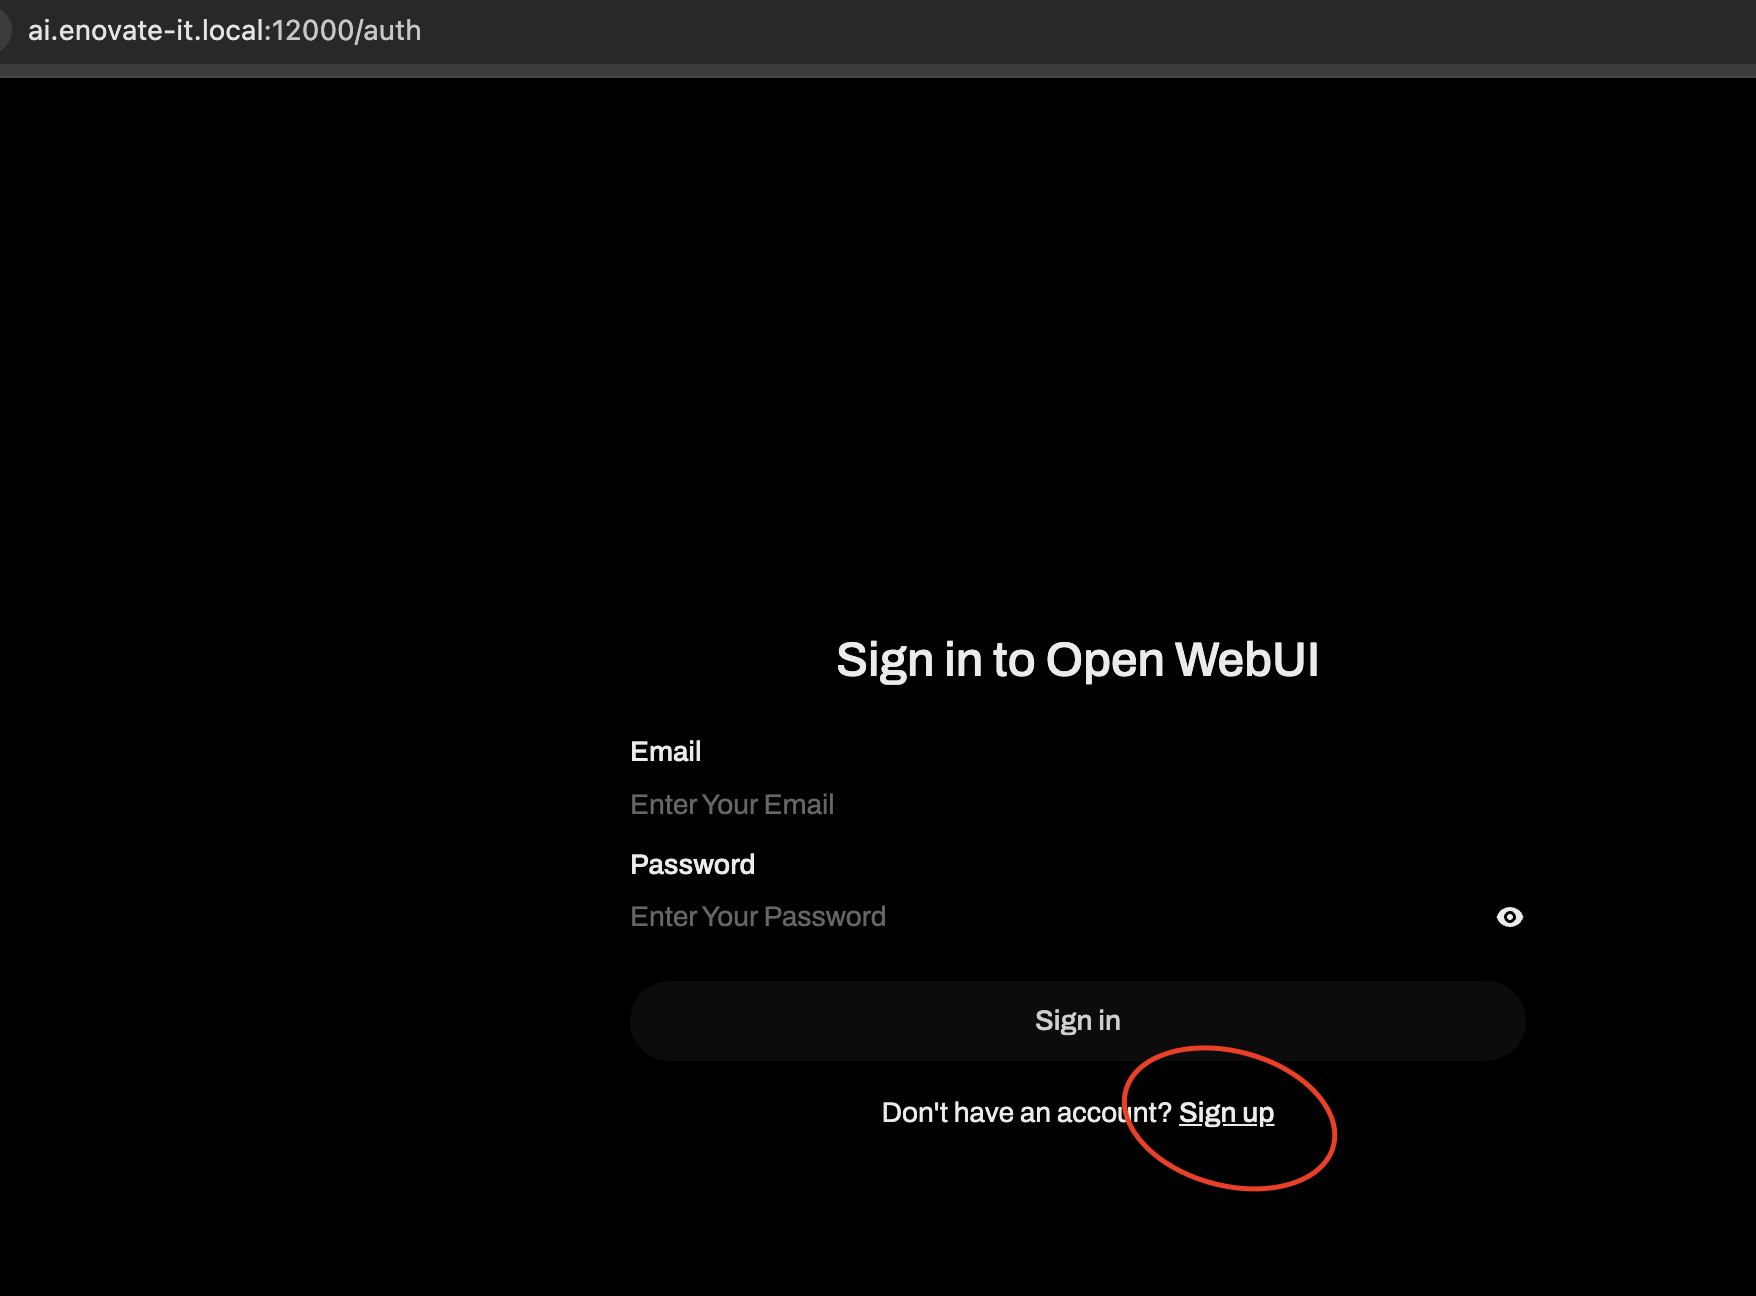 On the sign-up form, enter your **name**, **work email**, and a **password**, then submit. Once registered, sign in with those same credentials. > **Note:** Depending on the server configuration, new accounts may need to be approved by an admin before they become active. If you sign in and see a "pending approval" message, ping the infra team to activate your account. --- ## Step 2 — Open Settings Once you're signed in, you'll see the main chat interface with the available local models (e.g. **Qwen3-Coder-Next**). Click your **name / avatar** at the bottom-left of the sidebar, then click **Settings** (circled below). 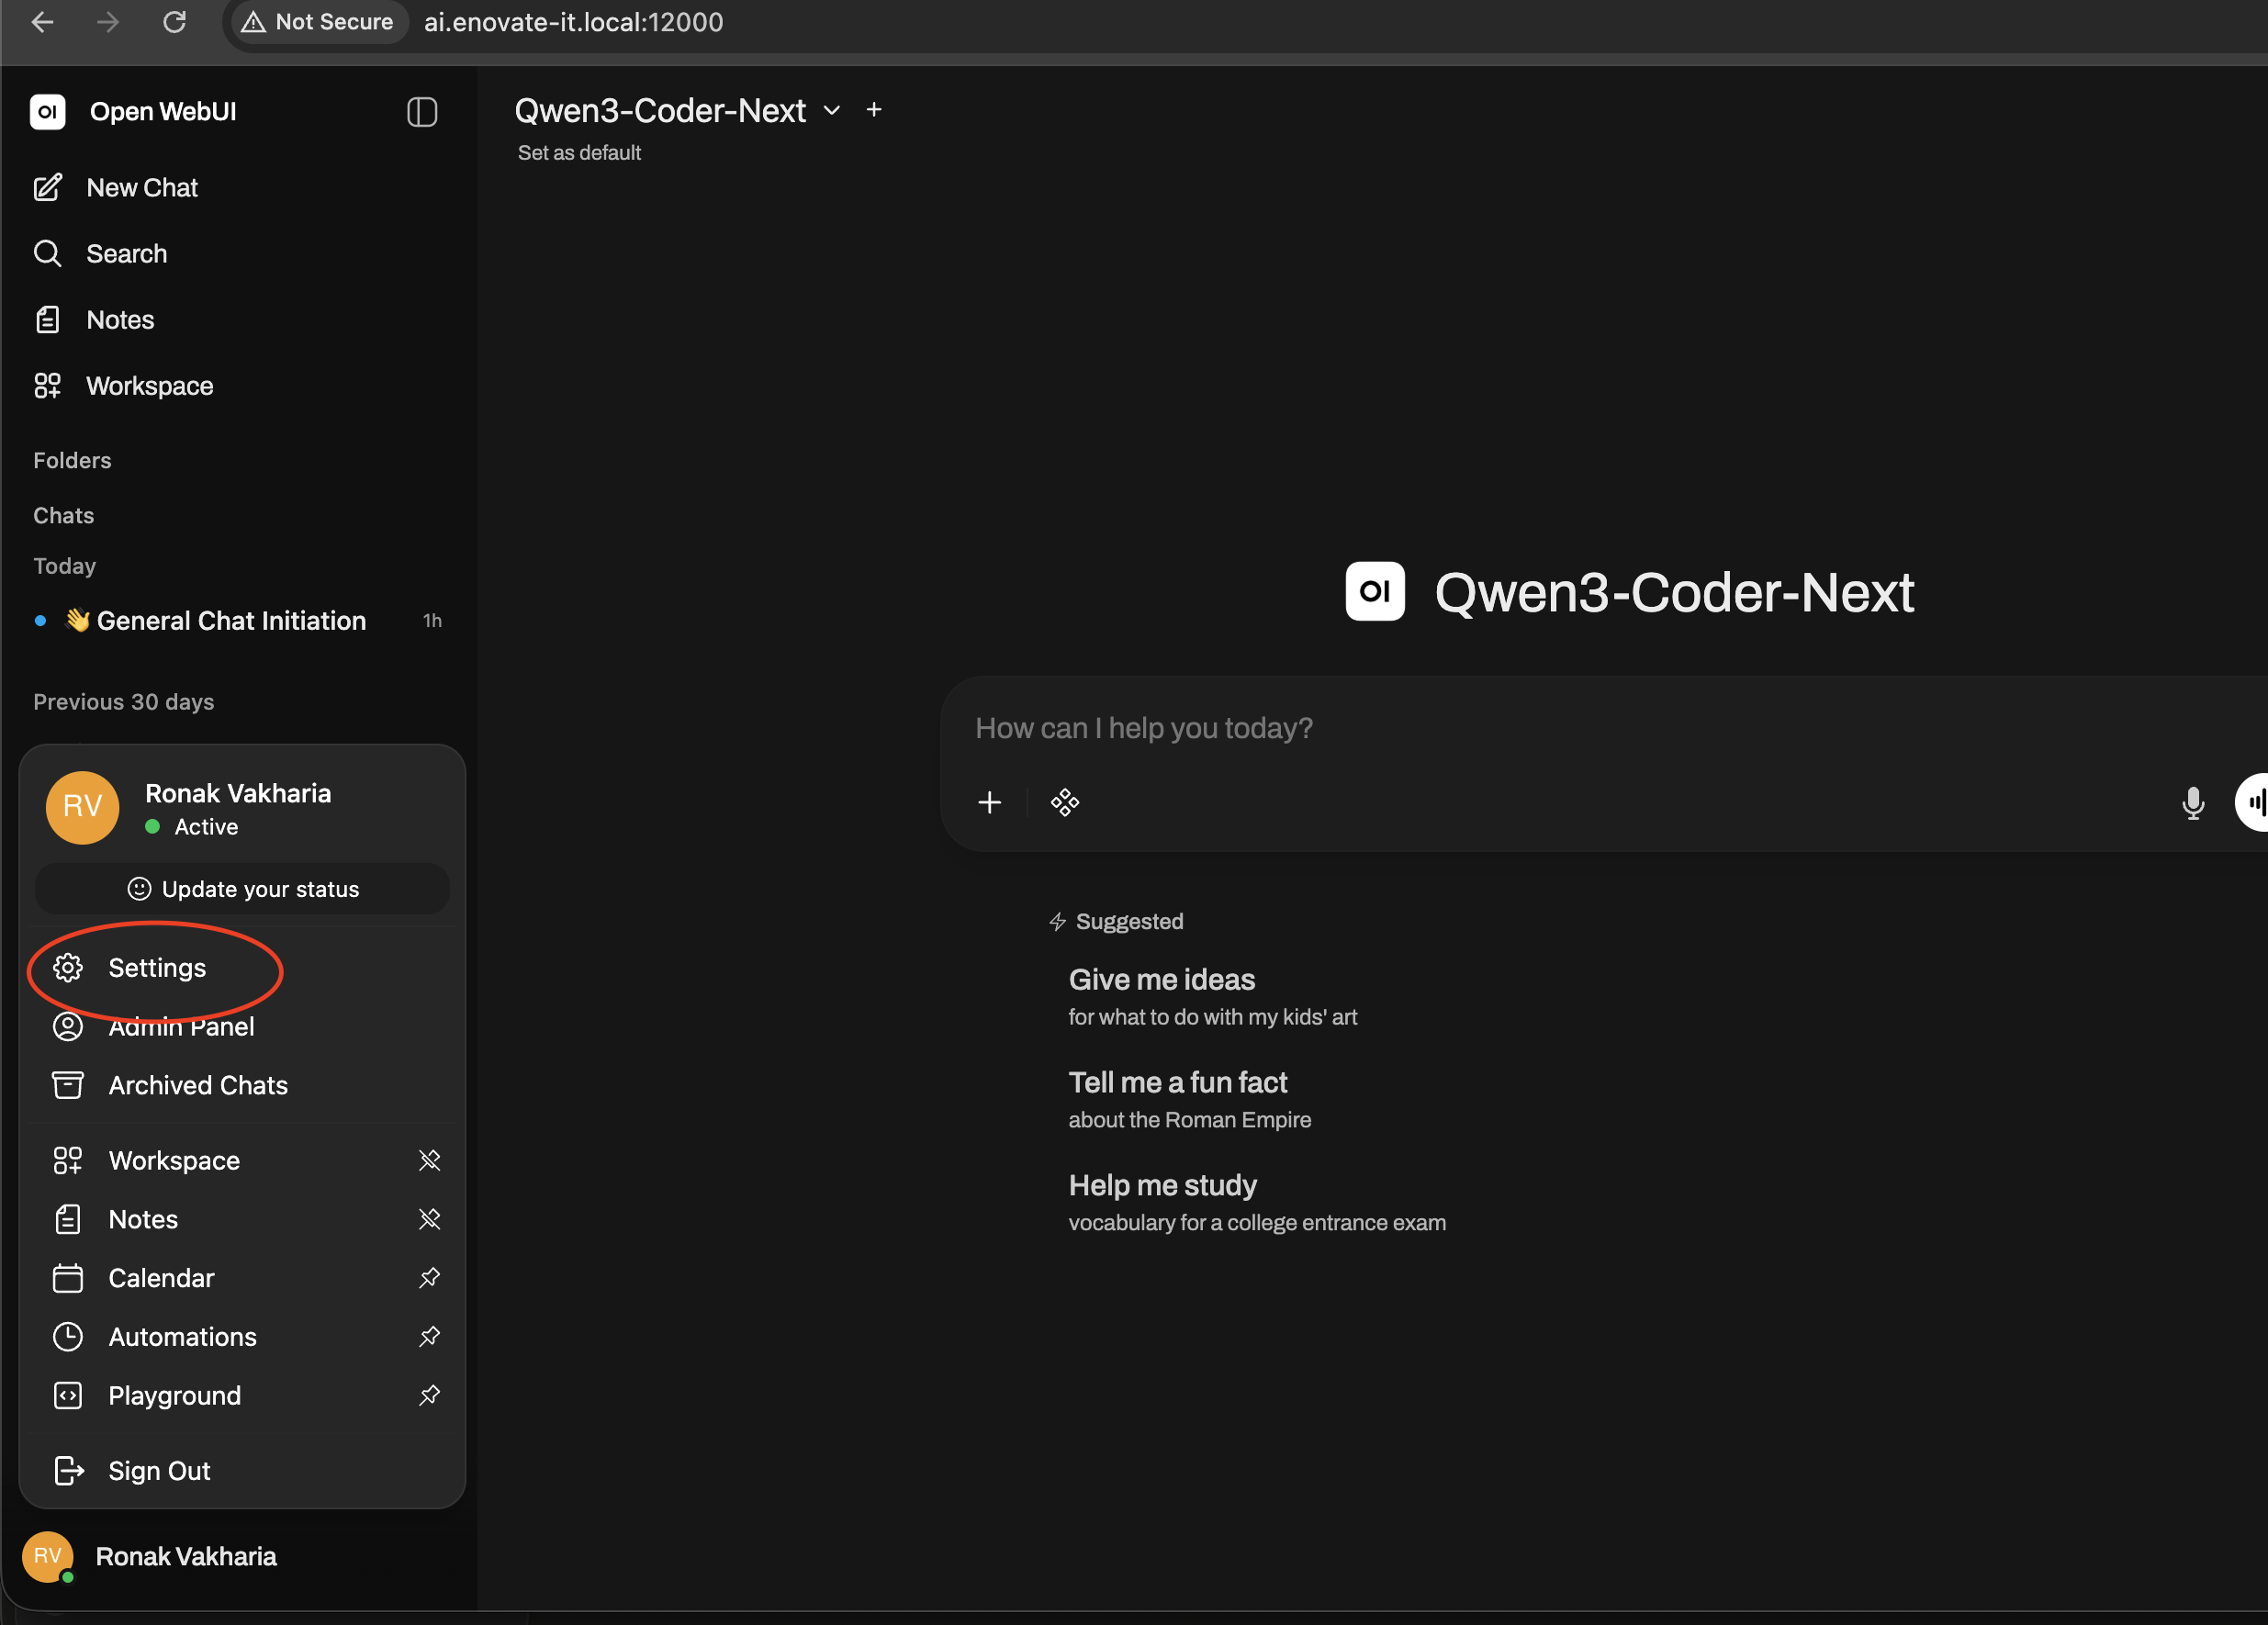 --- ## Step 3 — Get Your API Key In the Settings dialog, select **Account** from the left menu (circled). Scroll down to the **API Key** section at the bottom. Click the field to **reveal and copy** your key. It will look like `sk-xxxxxxxxxxxxxxxxxxxx`. 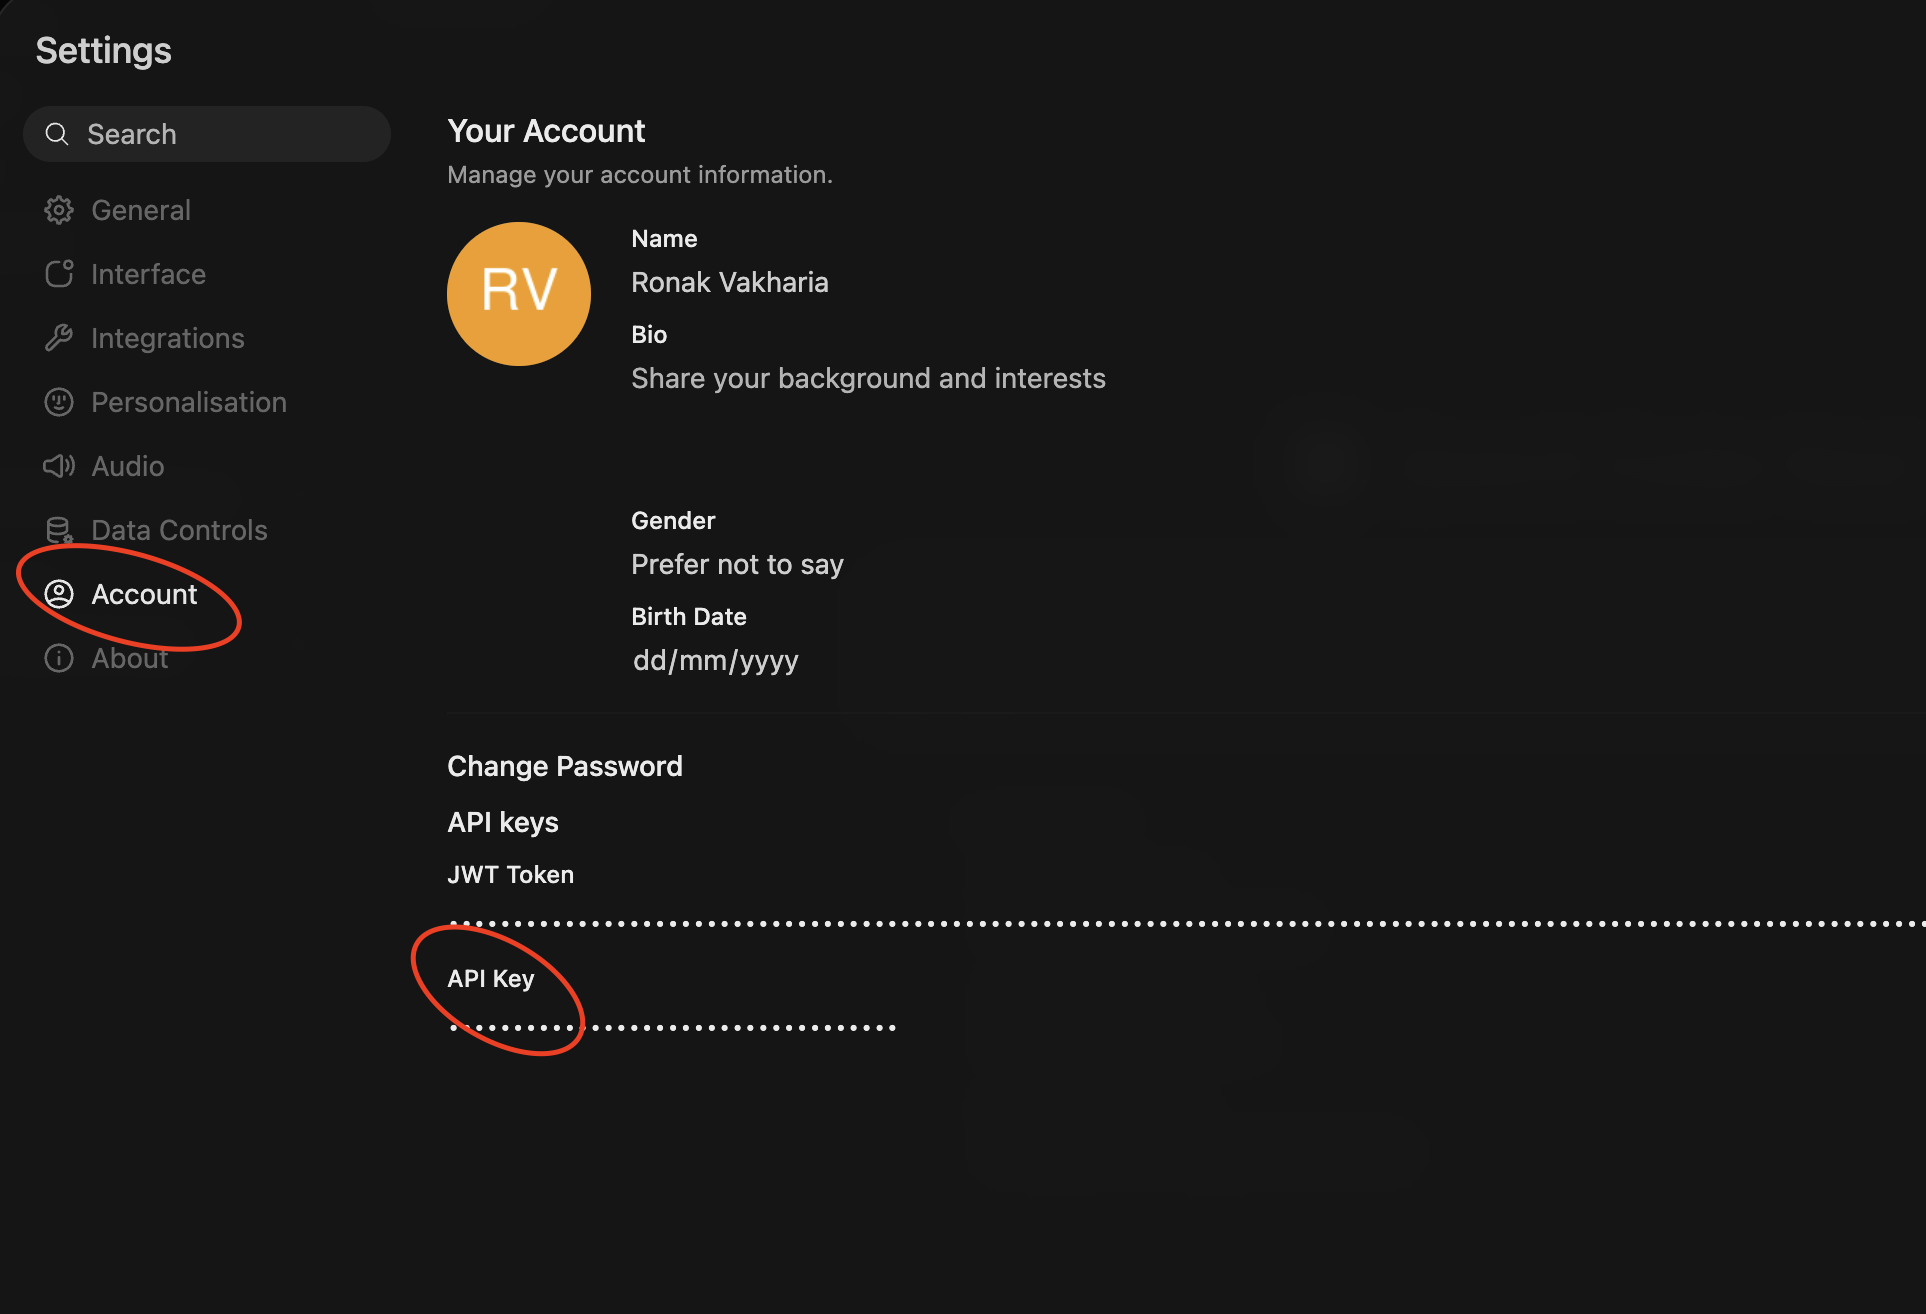 > ⚠️ **Keep this key private.** It is tied to your account. Don't commit it to Git, paste it into shared docs, or share it in chat. Treat it like a password. If you ever don't see a key, there's usually a small **"+"** / **"Create new key"** control in that section — click it to generate one. --- ## Step 4 — This Server *is* Your OpenAI API Platform Here's the key idea: **Open WebUI exposes an OpenAI-compatible API.** That means any tool that can talk to OpenAI can talk to our local server instead — you just point it at our URL and use your key. Wherever a tool asks for OpenAI settings, use: ```bash OPENAI_API_BASE="http://ai.enovate-it.local:12000/api" OPENAI_API_KEY="<your api key>" ``` - **Base URL:** `http://ai.enovate-it.local:12000/api` - **API Key:** the `sk-...` token you copied in Step 3. The rest of this guide shows how to plug that into the two most common coding setups. --- ## Option A — Aider (Terminal) **Best for:** people who like Claude-Code-style, terminal-driven pair programming directly on their repo. Project site: <https://aider.chat/> ### 1. Install Aider Follow the install instructions at <https://aider.chat/docs/install.html>. The quickest way is usually: ```bash python -m pip install aider-install aider-install ``` (or `pip install aider-chat` inside a virtualenv). Once done, `aider --version` should work. ### 2. Point Aider at the local server and run Open a terminal, go into the repo you want to work on, export the two environment variables, and launch Aider against the local model: ```bash # 1. Go to your repo cd repo # 2. Point Aider at the local AI server export OPENAI_API_BASE="http://ai.enovate-it.local:12000/api" export OPENAI_API_KEY="sk-xxxx" # <-- your key from Step 3 # 3. Launch Aider on the local model aider --model openai/qwen3-coder-next:latest ``` That's it — Aider will open a chat prompt in your terminal, aware of your repo's files. Describe the change you want and it will propose edits (and commits) directly. > **Tip:** The `openai/` prefix tells Aider to route through the OpenAI-compatible provider — don't drop it. The part after the slash (`qwen3-coder-next:latest`) is the exact model name as shown in Open WebUI's model dropdown. If a different model is available on the server, swap the name accordingly. --- ## Option B — Cline (VS Code / Cursor) **Best for:** people who prefer an in-IDE assistant with GUI-driven file editing, diffs, and task automation. ### 1. Install the Cline extension In **VS Code** (or Cursor), open the Extensions panel, search for **Cline**, and install it. ### 2. Configure Cline 1. Open VS Code. 2. Click the **Cline icon** in the left sidebar (looks like a robotic eye / target symbol). 3. Click the **Gear icon (⚙️)** in the top-right of the Cline panel to open settings. 4. Under the **API Provider** dropdown, select **OpenAI Compatible**. 5. Fill out the fields exactly as follows: - **Base URL:** `http://ai.enovate-it.local:12000/api` - **API Key:** paste your `sk-...` token from Step 3. - **Model ID:** the exact model string, e.g. `openai/qwen3-coder-next:latest` Save the settings. Cline will now route all requests through our local server, and you can start giving it coding tasks from inside the editor. --- ## Quick Reference | Setting | Value | |---|---| | Portal (sign up / chat) | `http://ai.enovate-it.local:12000` | | API Base URL | `http://ai.enovate-it.local:12000/api` | | API Key | Your personal `sk-...` (Settings → Account → API Key) | | Example model ID | `openai/qwen3-coder-next:latest` | | Access requirement | **Must be on the office VPN** | --- ## Troubleshooting **The URL won't load / "server not found".** You're almost certainly off the VPN, or the internal DNS isn't resolving `ai.enovate-it.local`. Reconnect to the VPN and try again; if it still fails, contact the infra team. **Browser says "Not Secure".** Expected — the internal portal uses plain HTTP. Proceed normally. **Aider or Cline returns a 401 / auth error.** Your API key is wrong, expired, or has a stray space. Re-copy it from Settings → Account and make sure `OPENAI_API_KEY` matches exactly. Regenerate the key if needed. **"Model not found" error.** The model ID doesn't match what's on the server. Open the model dropdown in Open WebUI, copy the exact name, and use it after the `openai/` prefix (e.g. `openai/<exact-model-name>`). **My account can't sign in after signup.** New accounts may require admin approval. Ask the infra team to activate yours. --- *Questions or something broken? Reach out to the infra / platform team.*